Week 1 - Unity


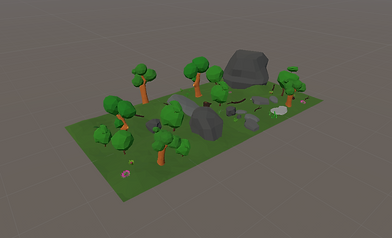

This was created in unity by downloading the Low Poly environmental pack. by clicking and dragging the assets onto the screen, I was able to create a forest-like floor, with trees, boulders, foliage and stumps as well as logs. As the name suggests, it is a low poly environment; it doesn't represent a realistic environment. I resized each and every one of them for consistency. This example was to represent my knowledge of using this software for some projects that I may do in the future.
Week 2 - Maya Scene Organisation

For this week, we were working Maya Scene Organisation, at first we opened the ma. file and these objects will show up. I opened the outliner, and clicked on "persp" and set the "near clip plane" to 5. This removes any clipping at any distance.


Maya - Hierarchy
For this next part, I grouped the images together, this is an alternative to combining the mesh altogether. How I did this was, I selected the tree trunk, and the leaves of the tree, and simply go edit > and then group. I can also press ctrl + g to quickly apply the hierarchy.


Maya - Display layers
Applying layers to the models will help distinguish poly models from one another, clicking the "V" button will toggle the visibility of the poly model. Once layer is applied, the poly model appear as a pink wireframe model.


Maya - Poly count
Displaying the poly count will indicate how much faces, edges UVs etc. there are on a poly model as seen on the picture opposite.
Maya - Duplicate special
One of the most simple features in Maya, the duplicate special will organise duplicates on any poly model. Translate will organise how many spacing and direction of the duplicates, rotation of the objects as well the sizes of each. This also manipulates how many duplicates of the model will be


Maya - Smoothing

By pressing 1 on the keyboard, the shape of this mountain will revert to it's original shape which usually consists of sharp images. By smoothening the object, it will actually smoothen it instead of pressing 3 on the keyboard, so when the object is imported to a different software, it will show as an actual smooth object instead of its previous shape
Maya - Soft select
Soft select is one of the few many ways to sculpt an object in Maya by double clicking on the move tool, a window will pop up showing the settings, tick the soft select box and simply move the faces in any direction. There is an option to increase the radius of the soft selection to select the faces of the model.

Maya - Sculpting

Sculpting is one of the main ways to detail an object within Maya. There are several tools to use in terms of sculpting, Waxing, Lifting a surface, Smoothen a surface etc. When sculpting, several of these have the ability to use a stamp. A displacement stamp will allow to use an image to simply "stamp" onto the model. On the image used opposite, I used an image below to apply the stamp.

Week 3 - Environment modelling


For this week, I created a plant with two different types of leaves, the method I used for was Image Alpha channel to create transparency. First, I applied a plane poly to create the leaf. I set the width and height as 2 x 2. With the object selected, I assigned a new material, this new material type will be set as Lambert.
Within the attribute editor, by clicking on the box on the right side of the colour channel, I clicked on file. By selecting where I saved the leaf file, I applied it onto the plane poly.
At first it won't appear as a leaf, by pressing 6 on the it will reveal the newly applied textures onto the poly. Then, I created a small plant by simply colouring and resizing a cylinder poly brown and duplicated the leaves
Week 4 - Arnold Lighting

This week, we explored lighting, I used a cat statue model to present lighting for Maya. For this picture I just simply applied a simple Arnold area light. I resized and rotated it to my liking. When first rendered, it is very dim, I experimented the exposure and spread within the attribute editor to adjust the lighting properly

for this picture, I applied a light blocker onto the cat model, notice how the lighting applied onto the cat is slightly dimmer . This is due to the light blocking "cube" that has been implemented. The model is "inside" the lighting blocking box that prevents an exposed/bright light from being emitted onto the model

This window represents the light editor and can be opened via Window > Rendering Editors > Light Editor. The light editor is an alternative to the Attribute Editor where to simply edit the light's exposure, the intensity and colour. The light editor can also enable the look through to help me in replacing.
Week 5 - Organic Modelling, UV unwrapping and ZBrush

For this week, we worked on organic modelling UV unwrapping as well as Zbrush. To present my knowledge, I downloaded a tree model and unwrapped it. To unwrap the model, I cut the edges of the tree as seen by the white lines on the model. Once unwrapped, I unfolded the UV shells and it should appear as unwrapped on the UV editor as seen on the right image above.

Once all the Maya process is done, I exported the tree object as an OBJ file, then imported onto ZBrush. Here's where I began the process of detailing the object with realistic texturing. As provided by this picture, the tree that was given has a wood-like detail added onto it, giving it a realistic representation to the appearance of the tree. Detailing the object using this software is very useful for realistic high resolution 3D models.
Week 6 - Materials Setup
For this week session, I have been introduced to material setup methods. One in particular I have been doing is creating a New Phong material by setting it up via Hypershade. It is all represented by this tree I've used for this week's lecture.
First off, I downloaded the tree model that was already provided for us, it includes the asset (Tree) as well as the displacement map.
Now that has been implemented, I opened Hypershade to apply the new materials provided for the tree asset. From here, I created a new material, by going to the left side of the hypershade window, a panel listing all the materials to apply to any model; the material I will be using is called Phong .
Once placed, there will be a node connecting to Phong1SG, by clicking on it, it will open the property editor on the right hand side panel, from here I then clicked on the Displacement material's checker box. This will begin the process of loading the displacement map.
A file1 tab will then open, by clicking on the folder next to Image Name will also open the Create Render Node window. I clicked on file and loaded the corresponding displacement map that came with the tree model.
Now, the tree will now need the appropriate colour. Selecting Phong1 will open the Phong1 on the property editor. Cicking the colour's checker box will, again, open the Create Render window, select file and then load the colour that came with the asset.
This process is far from finished, I will now need to apply the new material onto the tree. I selected the tree model on the viewport, this will highlight it, I then returned to Hypershade and by right clicking on Phong1, I then selected assign material to viewport selection.
Finally, by pressing 6 on the keyboard, the material will be displayed onto the tree, and by going to the attribute editor, scrolling down to smooth mesh, tick the displacement preview and it will display textures for the tree.


Assessment 1: CGI Dimensions of Practice

UV Shell Snapshot
To start off this project, I first created a tree in Maya from scratch, using my knowledge and a variety of tools at my disposal. First, I used a cylinder poly to create the base/trunk of the tree and simply stretched the model to its appropriate length.
I then pressed shift + drag on top of the trunk to create protrusions which will then serve as its branches, I separated the face from the protrusion and then bridged the gap between the tree and the face, creating a branch in the process. Once the model has been finished, I then began the process of cutting and unfolding the tree’s UV.
The edges of the tree must be selected in order to unwrap it, I was able to identify the edges in which the shape will unfold via the white outline it is being represented by. Once all the appropriate edges have been selected, I clicked on the UV toolkit selected unfold tab and clicked unfold. The image opposite is the unwrapped tree UV shells.
Render of the tree detailing
Once all the poly modelling is done, I began the process of detailing the Tree using Mudbox. In order to import an object from Maya to Mudbox, I first exported the tree model in Maya to OBJExport. After that’s been exported, I opened Mudbox and simply clicked on file > import and selected the appropriate model to import into the software.
After experimenting with the tools on hand, I found that using the Wax tool was more than useful for this scenario. Adjusting and tweaking of the brush size and strength, as well as inverting the function to create creases onto the model was enough to create a rough-looking depiction of the tree.
Once all the detailing was done, I selected the model via edit > select all. This will highlight the model, and once the model has been highlighted, I clicked file > export selection to an OBJ file, similar to Maya’s process of exporting. The OBJ file will then be imported onto Substance Painter.


Render of substance painter texturing
To simply import the model onto Substance, I just created a new project, selected the appropriate OBJ file to import, change the resolution to 2K, and simply click OK. Once clicked, the screen should represent the tree.
Once it is loaded, I began the process of applying a wood texture onto the tree, which was more than appropriate for this model. I adjusted the size of the brush as well as the angle to make it as realistic as possible. The render can be seen by the image above.
Render of Maya Arnold lighting
I also applied lighting to the final rendition of the model to show common knowledge of Arnold lighting. The example of lighting used for this model was area light, I experimented with the intensity, exposure and angle of the light to however I see fit.
I showcased this via Arnold render to show a high-resolution representation. I also adjusted the resolution via render settings to HD_1080 of two light sources being emitted onto the model, the final render is shown by the image above..

Assessment 2: Materials & Shading

To start off this assignment, I first loaded a model onto Substance painter. Using this skull model proved to be quite useful to demonstrate my knowledge of detailing 3D models. This render shows intricate details using substance painter and its available tools. I first began by baking the mesh map. Baking essentially means the process of transferring information within a mesh to a texture file, this usually involves two meshes one high poly and the other low poly. The high poly mesh’s information will be transferred onto the low poly mesh which will then be saved into a texture.
On the right panel and on texture set settings tab there is a button called “Bake Mesh Map”, by pressing this will open a window, I set the output size to 2048 x 2048 (2K) and then click “Bake default/Mat mesh maps. By doing process I will now be able to access the mesh map data for the skull model.
Substance painter is an industry standard for model detailing and texturing; therefore, it comes with a variety of useful tools. Material presets have been applied to the skull model. On the bottom panel, there is the “shelf”, within it are the material presets that can be applied to any 3D model, it also has Smart Materials. Smart Materials are realistic material presets that will show a more realistic representation for a 3D model.
Much like Photoshop, once the presets have been applied, it will show up as a material on the layers panel. I also added a fill layer by clicking on the “Add fill layer button”. The fill layer is coloured green which can be seen on the skull. I also applied a worn-out texture to it by adding “metal edge wear” via the generator.

For further detailing, I added a new layer from the layers window and changed the colour to yellow via paint section. From the shelf panel, I then selected Alpha stamp and chose the “Arrow Circle” and “Arrow Bend Split” stamps. With this, I am able to stamp and paint the model onto the layer. I placed the arrow circle on the forehead and inside it is the arrow bend split but with a red colour instead. I finished the model by presenting on iRay render. Like Maya’s Arnold renderer, I can also modify its resolution and experiment with different settings to showcase a high-quality model.

For this next part, I exported the skull from Substance and imported it onto Maya for Arnold rendering as shown on the image above. This is to demonstrate the Hypershade setup that has been implemented onto the 3D model.
To begin this process, I started of exporting the textures by going to file > export textures on Substance painter. I then set the resolution to 2048 x 2048 (2K) once more for higher quality resolution. I then clicked on the configuration tab and change the preset for Arnold 5 (aiStandardSurface). I went back to the previous tab and simply export the textures.
I then imported the mesh itself by file > Export Mesh. This will allow me to import the mesh onto Maya. I also saved the file as a Wavefront OBJ format (OBJ). Once the process of exporting is complete, I then import the mesh onto Maya; the skull will be placed but will lack texture.
To add the texture, I opened Hypershade and searched for aiStandardSurface via the create panel on the left side. With this, I am able to apply the textures, these include the Colour (Base Colour), Metalness, Roughness, and the Bump Mapping, all respectively have their own image file to implement. Each preset has their own colour base, Colour must be set to sRGB, both Metalness and Roughness must be RAW and the “alpha is luminance” box must be ticked, whilst the Bump Mapping only has RAW for its colour space.
Once all of this has been implemented, I simply dragged the material onto the mesh and pressed 6 on the keyboard to reveal its textures. Finally, I rendered the skull using Arnold and changing the resolution to HD_1080 (1080p) for a high-quality representation.
Assessment 3: Personal Development
For this assignment, I will be focusing on Arnold rendering; I have created several effects for the tree I used for the first assignment. This asset was used to represent fog as well as volumetric lighting, which is also known as God Rays.

Arnold Rederer (Atmosphere; aiFog)
I first started off this assignment with implementing a fog for the tree, I thought it would be better suited for this type of asset to add an eerie environment around it, I applied the fog via render settings. At the Arnold tab, I scrolled down and clicked on environment and applied aiFog. Once clicked, I then proceeded to adjust the settings via attribute editor.
From here I can change the fog’s colour, its thickness by adjusting the distance slider, as well as position it by adjusting the height slider, changing the values on both ground normal and ground point, by changing the fog’s colour can certainly factor in some eeriness. For example, the green colour emulates a “radioactive mist” which creates a dystopian and desolated effect.


Volumetric Lighting (God Rays; aiAtmosphereVolume)
The second Arnold implementation I applied to the Tree’s environmental effects is volumetric lighting, or simply known in the industry: God Rays. This is used to create sunbeam (crepuscular ray) effects as well as blooming light effects. This is one of the more commonly used lighting effects in games and 3D animation alike.
I proceeded again by opening the render settings and navigating to the Arnold Tab. On the environment section of the settings, I then clicked on the atmosphere box on the right-hand side, and instead of applying aiFog, I clicked on aiAtmosphereVolume. This will create a mist-like effect that will produce the desired god rays in the process. On the sampling section, I began to adjust the Camera (AA) and Volume Indirect sliders up to 5; this will apply a much higher quality lighting. And on the Attribute editor, I altered the value of the sample to 5 as well.
To show the God Rays, it needs a light source, what I did for this was to create a spotlight and place it directly behind the tree’s branches, on the attribute editor I adjusted the light source’s intensity as well as changing the colour to pale yellow colour to emulate sunlight. I also altered the colour ever so slightly darker to resemble sunset-like god rays being emitted onto the tree.